How to create a server on AWS to run WireGuard VPN
A step-by-step guide to creating an AWS account, launching an Ubuntu server on EC2 and connecting to it over SSH, ready to run WireGuard VPN.
- Key idea
- Definition
- When to use
- Caution
In this article
What is AWS?
- AWS stands for Amazon Web Services, a large website that provides web hosting services for servers.
- A server is a powerful computer that runs 24/7, which you can use to run programs like VPN.
How to access AWS website?
- Open your internet browser (like Google Chrome or Firefox).
- In the search box (or address bar) type: "AWS" or "Amazon Web Services" and press Enter.
- Choose the first result which is usually https://aws.amazon.com
- Click on the Sign Up button (create new account).
Create AWS account
- Fill in your details: email, password, name, etc.
- You'll be asked for a credit card (there's a free trial for some services for one year, but you need to enter card details for verification).
- After registration, log in with your account.
Access EC2 service
- After logging in, on the main page, in the top search box, type EC2 and select the result.
- EC2 service is for creating virtual servers.
Create new server (Instance)
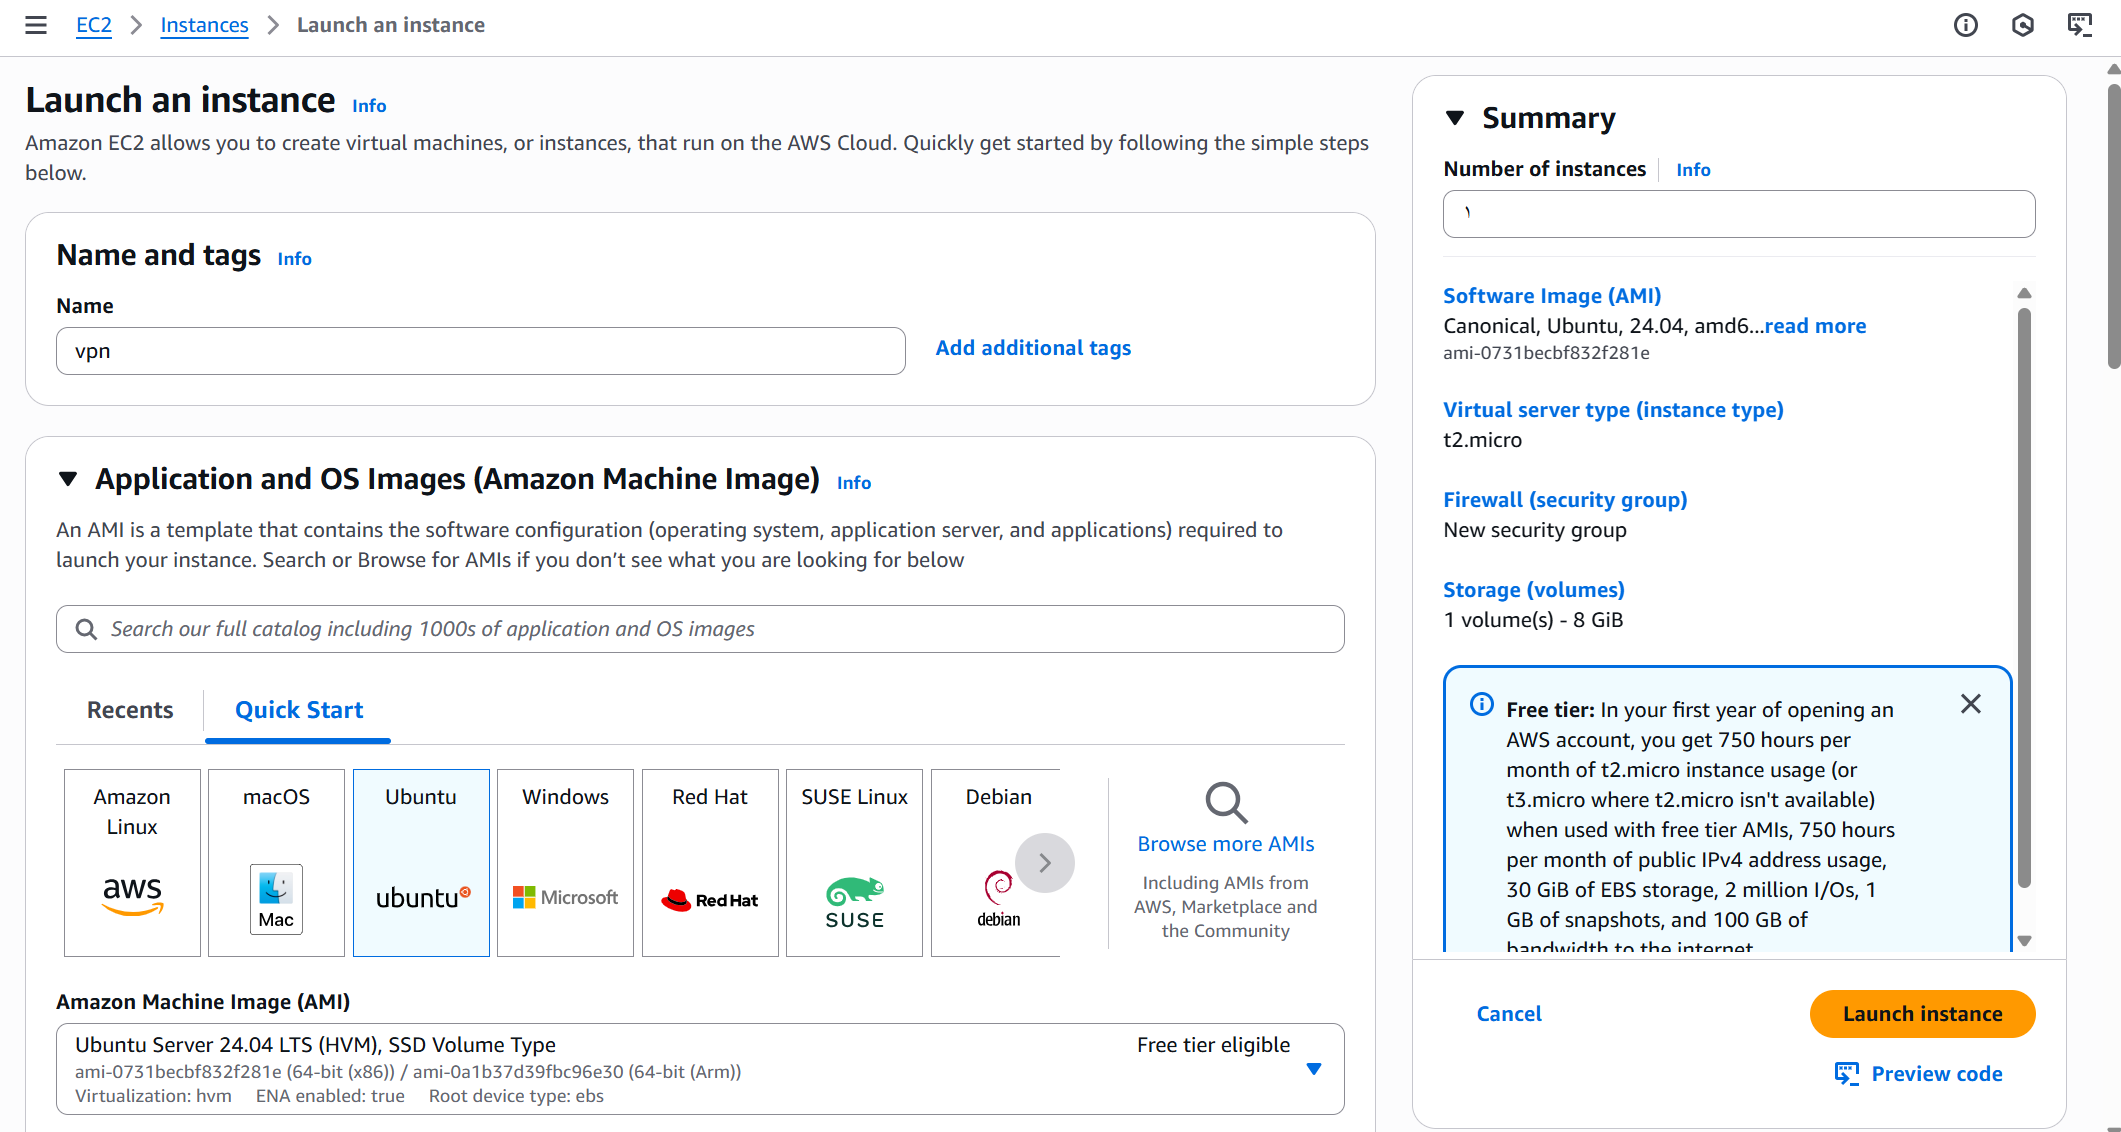
- On the EC2 page, click on Launch Instance (start new server).
- You'll be asked to choose an Operating System, select Ubuntu (it's a Linux-like free OS).
- Then specify server specs (location, memory size, processor...).
- Choose default or small options to make the experience easy and cheap.
Create Key Pair file
- You'll be asked to create a Key Pair file which is very important.
- This file is what you'll use to access the server via SSH.
- Choose a name for the file and click Download to save it to your device (usually in .pem format).
- Keep the file in a safe place, because without it you can't access the server.
Configure Inbound Rules
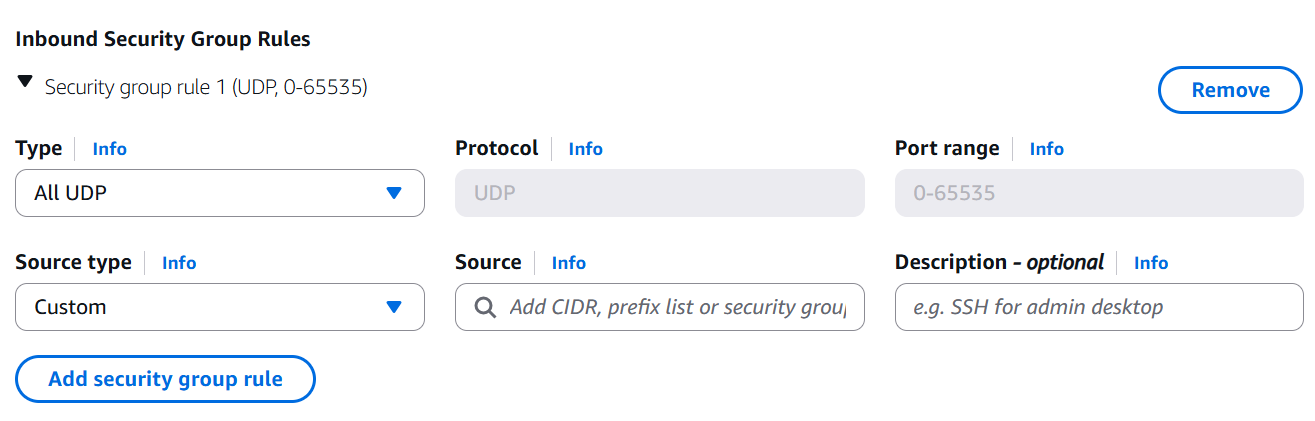
- On the server creation page, in the Security Group section, you specify access rules for the server.
- Click on edit
- Then click add new rule and do the following:
Launch the server
- Click the Launch button to start the server.
- After a few minutes, the server will start and give you a Public IPv4 address (like 54.67.153.151).
Access server using SSH
-
Open Terminal if you use Linux or Mac, or PowerShell/CMD if you use Windows
-
In the terminal (text interface), type the following command (adjusting the path, key file name and address)
Bash # Access server using SSH ssh -i path_to_file ubuntu@IP_address -
Example:
Bash # Example SSH access ssh -i ~/Downloads/aws-key.pem [email protected] -
If a security message appears, type yes and enter.